Editing Sounds in Raven Lite
Once you’ve come back from the field with a card full of new audio, renamed the files, and backed everything up, you may want to think about editing your sounds. While having untouched originals is useful if you’re doing scientific analyses, editing portions of the sound for posting on the internet, sending to friends, using for quizzes, etc. can make it easier to get your sound out there and heard by others.
Pretty much all the tracks used on commercial CDs of bird sounds have been edited to one degree or another, often quite heavily. Just because the recordings on, say, the Stokes Field Guide To Bird Songs sound like they were recorded in a sound room with no background noise doesn’t mean they were; quite likely most of them were the target of skillful and careful editing to bring out the target species in the recording.
I use two different programs to edit sounds. The first is Raven Lite, available free from the Macaulay Library. Though somewhat limited in its abilities, it does let you do some basic editing that, for many, will be sufficient for their sound editing needs. Detailed below is my normal process for editing recordings in Raven Lite.
Disclaimer: to best hear the results of the methods below I recommend using headphones when listening to the examples. Low frequency sounds are hard to hear over laptop speakers and small external speakers, so if you don’t hear a difference in the examples below that may be the problem.
Step One: Crop
First off I load the original recording. The first step is to select the part of the sound you want to edit…usually for me this involves cutting out any talking I did into the mic at the end of the cut, and sometime some severe handling noise from the beginning. Quite often the loaded sound is longer than the one minute maximum that Raven imposes on files…longer than that and you can’t edit it, and you have to save it in one-minute chunks. There are two ways to deal with this:
- select a one minute piece that you want to have as the final edited sound and “save selection as” for your new file that you will edit, OR
- copy one minute chunks and paste them into a completely new file, one after the other.
Using the second method you can get up to about three minutes of your recording into an editable file before Raven runs out of memory. Once you get over those amounts you have to create two or more files to edit and then paste them together using another program (I recommend Audacity).
Step Two: Filter
Once I have a manageable section of audio to edit, I filter out low frequency rumble (discussed in the “extra credit” box at the bottom of the Noise page), which is present in all recordings below 300-400 Hz or so. It’s more noticeable if you are recording in noisy conditions, and less noticeable if you are recording a very loud bird and the gain was turned way down.
Filtering out this low frequency band of noise can have varying consequences. If you were recording in a quiet environment it typically makes the target signal easier to hear and the whole recording more pleasant to listen to. However, if you were recording somewhere with increased background noise, such as traffic, it has the effect of making any noise that you didn’t filter out (i.e., the low frequency noise above what you filtered out) sound tinnier and unpleasant. When this is the case, there are several options. First, you can filter out a larger frequency band than normal, but this often results in a “hissy” tone to the whole recording, as in the following example:
On the other extreme, you can actually filter less of the low frequency band than you would normally; quite often the whole recording will sound better with less filtered in such cases than with more. (In an upcoming post I’ll discuss advanced techniques for filtering out low-frequency noise, including frequency replacement.)
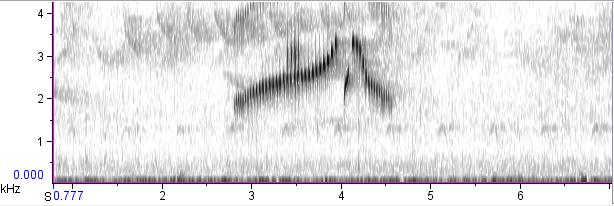
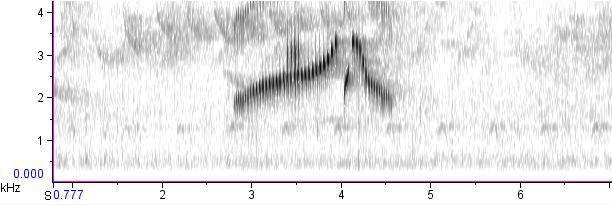
To remove the low frequency band in Raven Lite, select the frequency band you want to filter out (vertically), and then expand it horizontally to cover the entire time of the recording. Then go to edit, filter, filter out selection. This method is also useful if there is an especially loud band of insect noise in the recording, a common problem when recording in the tropics. You have to be especially careful to make sure you don’t filter out any of the target signal in these cases, though, since insect sounds are higher frequency and often overlap the bird sound you were recording.
Step Three: Amplify
After filtering, the next step I usually take is amplifying the recording. The amount I amplify is also a bit of a balancing act. When the target signal is quite loud I amplify little or none, whereas when the bird noise is very quiet I tend to amplify more.
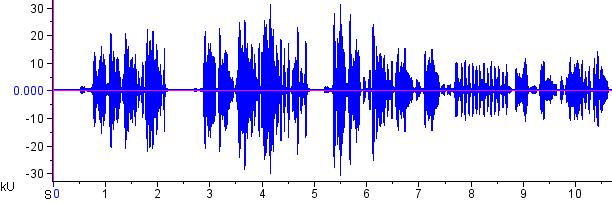
The key is not to amplify so much that the recording clips (like in the example below), but to a level approaching that. I tend not to amplify more than four or five times the current levels as this amplifies the background hiss as well, and makes the whole recording sound unpleasant. Experiment a bit with the amplification factor and find the result that sounds best to you.
Note that to deamplify you don’t use negative numbers, but fractions…i.e., a 0.9 multiplier deamplifies to 90% of the original level.
On a side note, amplification is one of the few things for which I like Raven Lite better than Audition. With Raven Lite you can pick a multiple amount to amplify by, whereas in Audition you amplify by dB. I find it easier to visualize how amplifying by a multiple will affect the recording, rather than using a more esoteric measurement like decibels.
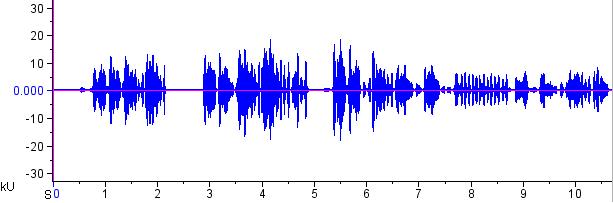
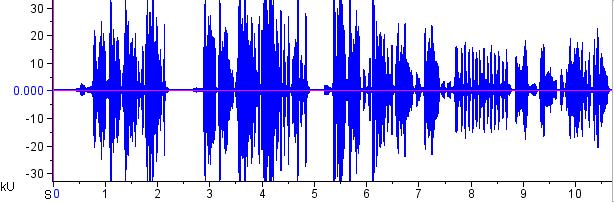
Extra credit: the images above are waveforms, a graph showing sound amplitude versus time. The higher the peaks on the waveform, the louder the sound. An ideal recording will have the highest peaks possible for the target signal without them maxing, and also having the lowest possible amplitude during the non target signal portions of the recording.
Step Four: Clean-up
Typically my final step when editing a sound in Raven Lite is what I call “clean-up” work: removing handling noise, talking in the background, the sounds of walking, car horns, etc. Note: I personally far prefer Audition over Raven Lite for this step, but back before I started using Audition, here is what I used to do.
Since in Raven Lite you can only cut and paste timed pieces of the recording covering the entire frequency range, you have to replace the whole time span of the sound that contains the unwanted noise. To maintain natural intervals between the bird sounds themselves, I select a piece of sound with no extraneous noise that is the same length of time and paste over the section with the unwanted noise.
At the very end I will often paste a little bit of empty sound at the beginning of the cut to give a bit of lead time until the first vocalization, and sometimes a bit at the end to make the whole recording more “symmetrical”.
3 thoughts on “Editing Sounds in Raven Lite”
Thanks for this post, Andrew. I’ve been doing the amplify step first and then the filtering step. It seems I have been doing it backwards. I will have to try it this way now.
When I want to amplify (in Audition) I use the Normalize feature instead of the amplify. With normalize you can use percentages rather than the dB found in amplify, which as you pointed out, are harder to ‘visualize’ (audiorize?) 🙂 For the limited work I do, normalize works well enough.
As a side note, I like the background birds in a recording, and don’t like the sterile sound of just one bird calling. E.g. Birds of Canada kept them in, and the booklets list some (but not all–which makes it fun to fill in the missing birds) of the species heard in the background. I find identifying all the birds in a recording is good practice for the field season when you’re out doing point counts. I’ve known a number of people who can identify birds if they sing one at a time, but miss so many birds when they are all singing. For training purposes I think there might be a (very limited) market for sound tracks that have numerous birds calling. Many of the song meter recordings that are used by various agencies will have a wealth of good sound tracks to chose from for these purposes.
Thanks for this. I have been using Audacity to do this – must admit I hadn’t realised you could do some of it in Raven Light.
I have been using the beta version of Audacity, which has a great noise removal tool. For an amateur Adobe Audition is very expensive.
Comments are closed.