Editing Sounds in Adobe Audition
While using just a basic program such as Raven Lite will be sufficient for many recordists, you may find yourself wishing you had a more versatile program for fine-tuning your recordings. If this is the case the one I recommend is Adobe Audition. It isn’t cheap – but it is a fully professional sound-editing tool and will let you do pretty much anything you want with your sounds.
In this post I will take a sound from a raw unedited start to what I consider a finished state. Some of the editing techniques below are the same as what you can do in Raven Lite, while others will be entirely new.
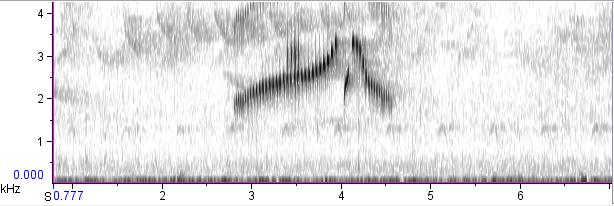
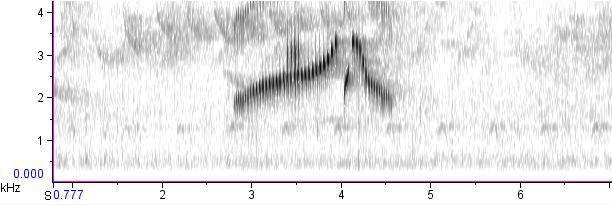
Before I start writing about various ways to manipulate a recording let me stress that the cardinal rule of editing a bird sound is to not alter the target signal itself. The example I use below is a pretty simple bird sound, so it is easy to not mess with the actual song. However in more complex cases you will not be able to use many of these methods quite as thoroughly. Use your best judgment and look carefully at the sonogram before starting any editing procedures.
Disclaimer: to best hear the results of the methods below I recommend using headphones when listening to the examples. You can also see larger images of all the sonograms and pictures below by clicking on them…this will be especially useful to see the finer details of the results of some of the editing.
Step One: Crop
As before, the first step is to crop out the audio you want to edit. Audition has the HUGE advantage of being able to load and edit cuts longer than the one minute limit of Raven Lite, and you don’t have to worry about any of that annoying copying and pasting to get longer clips. In the Waveform Display view, you use the Time Selection Tool to select a portion of the recording that you want to remove, and then go to “Edit”, “Delete Selection”, or simply just hit the “delete” key on your keyboard.

Step Two: Filter
This is actually more like three or four steps with Audition. I have gotten in to the habit of removing the low frequency rumble entirely, so I will describe my method for that first, then an alternate method later.
Using the Marquee Selection Tool, select the frequency range you want to remove…for most of my recordings this is from about 350-380 hertz (hz) and lower. Then go to “Edit”, “Delete Selection”. This will remove the frequency range you’ve selected, similar to using the “filter out selection” feature in Raven Lite.

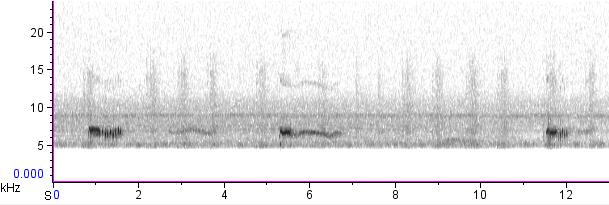
Notice how on this recording there is still a band of louder low frequency noise. This is where what is perhaps Audition’s most useful tool comes in handy. Hit “Ctrl A” on the keyboard to select the entire sound, and go to “Effects”, “Filter and EQ”, “FFT Filter”.
You will see this weird box with a straight line come up. This handy feature allows you to select frequency ranges and amplify or deamplify them as much as you want. For most my recordings I amplify from a minimum amount at 750 or 800hz to around –15dB at 400hz. To place points on the line click at the approximate frequency you want the point to appear. Next right click on the point, and type in the frequency and how much you would like it amplified or deamplified. The beauty of the FFT filter is that you can smoothly deamplify across a range of frequencies, so that no abrupt “line” is apparent. Notice how after applying the filter below the band of low frequency noise is the same strength as the sounds immediately above it.


But wait! The FFT filter is useful for far more than just deamplifying a small low frequency noise band. Notice that very noisy and very, very annoying band of insect noise around 3 kilohertz (khz)? Well, let’s kill it! The first step in removing insect noise is to figure out what frequencies it covers. I take the cursor and go first to just below the lower edge of the recording, and then to just above the upper one and write down those frequencies. Then I either figure out the halfway point, or the frequency of the most powerful part of the noise.

Now, back at the FFT filter window you will have to enter three points onto the graph. The first and third will be your high and low points, with an amplification of zero decibels (0 dB). The second will be the one in the middle or the height of the bug noise. For this one you can experiment with different values until you get the effect you want. Or you can compare the amplitude from the noisy part of the recording to the frequencies you used as the upper and lower bounds, and deamplify by that amount.

As a final step in the filtering process I also deamplified those two smaller bands of bug noise over the first part of the cut. You can deamplify portions of the sound by using the Marquee Selection Tool to select just the areas you want to deamplify, instead of applying the filter to the whole cut.
Remember how I promised to talk about another way to filter that lowest band of low frequency noise? Well, you can also use the FFT filter to deamplify the rumble at the bottom of the spectrum to a lower level, rather than just removing it. I remove it as a matter of personal preference, but many people prefer to leave even the lowest frequencies in their recordings and feel that it gives the cut a more natural sound.
Step Three: Clean-up
Notice all those popping and clicking sounds in this recording? Those are from a combination of handling noise – I was trying to find the bird for some clients I was leading while recording it, and thus moving around a lot – and also noise from said clients moving around. Many recordings have at least some handling noise, and it can range from merely a small annoyance to downright dreadful.
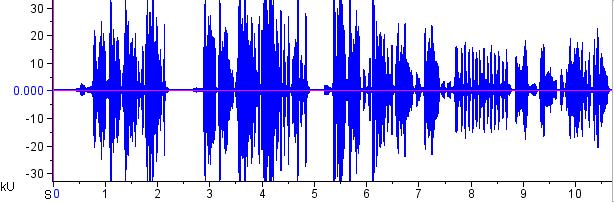
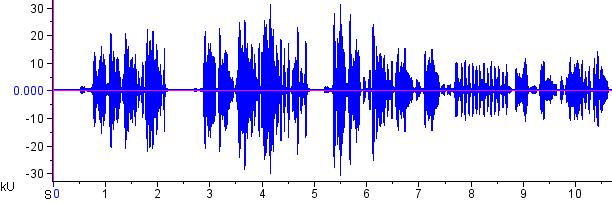
Audition offers a couple of ways to remove handling noise. The one I usually use is to select a small sliver of “clean” sound with the Marquee Selection Tool and paste it over the noisy section I want to replace. I typically try to select a piece of clean sound from close to the noisy part, but sometimes this isn’t possible. In this particular recording, note the nice clean section from 5.8 seconds to 6.6 seconds that could be used as a source of replacement sound.
Once you’ve selected the sound you are going to use to replace the noisy section, click a point on the spectrogram immediately before the part you are going to replace, and use the “mix paste” function to replace it. You can find this under the edit menu, or by using the “Ctrl+shift V” shortcut. Once you have the “mix paste” window up, click on “replace” rather than “mix”, and voila! The noisy sound will be replaced by the quieter one.
 http://earbirding.com/blog/wp-content/uploads/2010/03/striolated-puffbird_audition-cleaned.mp3 |
http://earbirding.com/blog/wp-content/uploads/2010/03/striolated-puffbird_audition-start.mp3 |
Another way to remove annoying clicks and pops is to use the “Spot Healing Brush” – this has comparable results, but I tend to use the method detailed above as a personal preference. Both these ways of removing background clicks and pops could also be used to remove other background noises — I quite often end up having to “mix paste” over some quiet talking in the background, for example. But I pretty much never remove natural background sounds, whether they be other bird species vocalizing, the noise of wings in flight, the sound of the target bird itself moving, etc. Again this comes down to personal preference, but I would rather have the sound be a better representation of the situation the bird was in than a completely sterile cut with nothing but the target species.
Step Four: Amplify
This step can actually be done at any stage in the process. I left it for the end in this discussion, but just as often I amplify right at the beginning, immediately after cropping. I actually amplified this particular recording before any of the steps I detailed above, for ease of illustration in this post.
For amplification it is best to be in the Waveform Display window, since this allows you to see whether or not the sound is clipping from over-amplification.
There are two ways you can amplify the recording. The first is to use the amplification tool, found under the edit menu, on the amplification tab. This amplifies it by a decibel (dB) amount, which I find hard to visualize. You can, however, use the Waveform Display to see how many dB the peak amplitude of the recording is below the max-out point, and then amplify by an amount less than the difference of those two numbers.
The other option is to use the “normalize” feature, also under the edit menu, amplification tab. This allows you to amplify the sound to some percentage of the maximum amplification possible. So, if you normalize to 100% it will amplify the recording to a point just below clipping. 50% will be halfway between no sound and maximum sound, and so forth. With this particular sound I will not amplify it any more than I already have, as the signal to noise ratio isn’t high enough (in my opinion). Many thanks to K. Cowcill for making me aware of this method.
Other Features
I will be the first to admit I barely scratch the surface of what Audition can do. The number of tools that you can use to tweak every aspect of your sound is simply staggering, and if you do some digging you will doubtless find additional ways of editing your sound that I haven’t talked about. One last method of filtering that I will discuss here goes way beyond the techniques I talked about above. It is also rather sketchy if you’re a purist about not touching the actual target signal itself. It is called dehissing, and it allows you to remove or deamplify ALL the background noise of your recording, leaving the target signal clearer.
But dehissing often doesn’t work well on certain types of bird sounds. I’ve found that it works best with clear whistles with little or no modulation; sounds that contain more noise or cover a broader frequency spectrum will be unacceptably altered by this process. I tend to not use dehissing much except in the rare case when I have heavy water or wind noise combined with a clear enough bird vocalization to make for an reasonable result.

Note the heavy background noise in this recording. While it would be possible to edit this cut in such a away that the background noise will be much less apparent by using the more standard techniques I talked about earlier, it would be impossible to be completely rid of a rather unpleasant amount of hissing. So, to filter the recording using the dehiss method, select the whole recording and go to “edit”, “restore”, “hiss reduction”. You’ll immediately notice a large number of options in this window, and I will freely admit that I don’t entirely understand how they all work. I typically set the precision rate at 40, the transition width at 7 dB, the spectral decay rate at 65%, and the hiss reduction amount at a varying number depending on how loud the background noise is. Finally, on the noise floor adjust level on the slider on the left, I use a number between 8 and 11, usually with some experimentation to see what results.

Note how the hiss reduction filter more uniformly removes background noise than is possible with just the FFT filter.
I chose this sample to illustrate a tiny portion of what Audition is capable of doing…experiment with it some, be sure to save untampered originals, and let me know if you find any other useful features I haven’t talked about here!